Showing posts with label Cookies. Show all posts

Sunday, December 21, 2008

Thick & Chewy Chocolate Chip Cookies


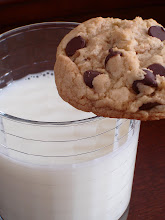
Everyone including myself is always on the search for the perfect chewy chocolate chip cookie! After many tries at recipes I flagged on the Internet, from a few of my many cook books and from friends, I turned to my collection of Cook's Illustrated magazine. I think I found (for now) what I believe to be the best recipe out there. They key to this recipe is using melted then cooled butter. Melting the butter separates the fat and water allowing the flour proteins to grab hold of the water forming elastic gluten sheets within the cookie. The result is the perfect chewy yet tender-crisp cookie. Enjoy!


Thick & Chewy Chocolate Chip Cookies
recipe from Cook's Illustrated American Classics 2008

Ingredients

2 1/8 cups all-purpose flour (2 cups plus 2 tablespoons)
1/2 teaspoon table salt
1/2 teaspoon baking soda
12 tablespoons unsalted butter, melted and cooled slightly (1 1/2 sticks)
1 cup packed brown sugar (light or dark)
1/2 cup granulated sugar
1 large egg plus one yolk
2 teaspoons vanilla extract
1-1 1/2 cup semi sweet chocolate chips

Directions
1. Adjust oven racks to upper- and lower-middle positions. Heat oven to 325 degrees. Line your baking sheets with parchment paper.
2. Whisk flour, salt and baking soda together in medium bowl; set aside.
3. In a standing mixer with a paddle attachment, mix butter and sugars until blended. Mix in egg, yolk and vanilla until combined. Add dry ingredients & mix until combined. Stir in chips to taste.
4. Roll scant 1/4 cup dough into ball. Holding dough ball using fingertips of both hands, pull into two equal halves. Rotate halves ninety degrees and with jagged surfaces exposed, join halves together at their base forming a single cookie, being careful not to smooth dough’s uneven surface. Place formed dough onto baking sheets with parchment, about nine dough balls per sheet.
5. Bake, reversing cookie sheets’ positions halfway through baking, until cookies are light golden brown and outer edges start to harden yet centers are still soft and puffy, 15 to 18 minutes (start checking at 13 minutes). Cool cookies on baking sheet.

Sunday, April 6, 2008

Long Overdue Update! Decorator's Dream Cookies


I just realized today that it's been OVER a month since I last updated this blog....all for a good reason, I promise!

Quick recap:
You see, marriage + starting a new job + house hunting + the love of baking = not enough time in the day multiplied by a few (or more) extra pounds on the tush. Not good. So i'm proud to say that I have just completed my 2nd full week of "Core" and i'm feeling great! However, this does mean no more baking for a while or until the next family function rolls around. Not to worry though, I do still have lots of photos and recipes to blog about from the past. So here's one that I managed to pull up.

I made these cookies for a bridal shower for a very close friend of mine. It was actually my first attempt at roll-out cookies...not bad right? I just need to work on my royal icing piping skills! This recipe comes from a The King Arthur Flour Cookie Companion cookbook given to me by my lovely sister for Christmas along with the awesomist cookbook holder EVER!

Decorator's Dream Cookies

1 cup unsalted butter
2 cups confectioners' sugar or glazing sugar
2 tablespoons light corn syrup
1/2 teaspoon salt
1/8 teaspoon Fiori di Sicilia
1 large egg
3 1/2 cups Unbleached All-Purpose Flour

In a medium-sized mixing bowl, cream together the butter, sugar, corn syrup, salt, and flavoring until light and fluffy. Beat in the egg. Add the flour, and beat until smooth. Divide the dough in half, wrap it well, and refrigerate for 1 hour.Take the dough out of the refrigerator, and flour your work surface and the dough. Roll it out very thinly (about 1/8-inch thick), using flour to keep it from sticking to the table or rolling pin. Cut out shapes, transfer to ungreased cookie sheets, and bake them in a preheated 350°F oven until just slightly brown on the edges, or until they feel firm, about 8 to 10 minutes. Let the cookies cool on the baking sheet for several minutes, or until they're set. Transfer them to a rack to cool completely.Cookies may be iced after baking, or sprinkled with sugar before baking. Or sandwich them together, using jam or frosting, to make linzer cookies.

Yield: about 4 dozen 2-inch cookies, or 1 1/2 dozen larger decorated cookies.

Wednesday, February 6, 2008

Peanut Butter Cup Cookies


My husband and I got married in September of 2006 and up until then, the only baking I did was from a boxed cake mix or a premade roll of cookie dough. It's amazing what getting married does to some people. I managed to turn into one hell of a domestic diva...or as my husband calls me, Betty Crocker. Having a huge wedding in September doesn't leave much in your budget for Christmas shopping in December! I decided to pass up on all the crazy holiday shopping one goes through in the hopes of finding the perfect gift for fellow friends and family. I kept my christmas shopping to a minimum and decided that instead, I would pack up an assortment of homemade cookies as gifts. This also gave me the opportunity to start working on MY holiday baking list.....and what will be my list 30+ years from now when i'm baking for my grandkids! It's important to have the perfect recipes right? Anyway, I came across this one on allrecipes.com by accident (don't ask me how.) I know it's not your typical christmas cookie, but I only decided to give it a try because I actually had ALL the ingredients at home in my pantry and I was extremly bored and felt like I needed to bake. I was so happy I did. Not only are they fabulous, but they're so easy to make and did I mention fabulous? They also hold up very well....perfect for those holiday trays!


Peanut Butter Cup Cookies
recipe from allrecipes.com

INGREDIENTS

1 3/4 cups all-purpose flour
1/2 teaspoon salt
1 teaspoon baking soda
1/2 cup butter, softened
1/2 cup white sugar
1/2 cup peanut butter
1/2 cup packed brown sugar
1 egg, beaten
1 teaspoon vanilla extract
2 tablespoons milk
40 miniature chocolate covered peanut butter cups, unwrapped

DIRECTIONS

Preheat oven to 375 degrees F (190 degrees C).
Sift together the flour, salt and baking soda; set aside.
Cream together the butter, sugar, peanut butter and brown sugar until fluffy. Beat in the egg, vanilla and milk. Add the flour mixture; mix well.
Shape into 40 balls and place each into an ungreased mini muffin pan.
Bake at 375 degrees for about 8 minutes. Remove from oven and immediately press a mini peanut butter cup into each ball. Cool and carefully remove from pan (see note below!)

Note...make sure you allow them to cool for about 10-15 minutes before you try to remove them from the pan or else see below!

Sunday, December 30, 2007

Cranberry Pistachio Biscotti

I can't help but think of my father whenever I see or eat pistachios. My father can easily polish off an entire bag of them. He'll sit in front of the TV late at night when everyone else is in bed with a dish towel in front of him and he would begin cracking away at each individual shell one by one. And every morning I was sure to find a nice little happy trail of shells leading to the garbage can as well as a few left over on the rug where he sat. What a mess!
I have since gotten married and moved out. And as much as I complained then, having to clean up that mess, I sure do miss being at home with him. His love of the pistachio has rubbed off on me and now my husband. So when I looked in my pantry one day and saw this HUGE bag sitting in front of me, I knew I had to do something about it! I grew tired of eating just a plain pistachio and wanted something "close to home." Being from an Italian family, we always had biscotti around the house so when I saw this recipe on epicurious.com I knew it was the perfect solution. I tweeked the original recipe a bit. And i'm very happy with the results. I cut down both amounts of pistachios and cranberries, omitted the aniseed and added a bit more lemon peel. I was able to satisfy my craving and send the rest home to dad! Enjoy!


Cranberry Pistachio Biscotti

Ingredients:

2-1/4 cups all purpose flour
1-1/2 teaspoons baking powder
3/4 teaspoon salt
6 tablespoons unsalted butter, room temperature
3/4 cup sugar
2 large eggs
1-1/2 tablespoon grated lemon peel
1-1/2 teaspoons vanilla extract
3/4 cup dried sweetened cranberries
1/2 cup shelled natural unsalted pistachios

Directions:

Preheat oven to 325°F. Line 1 large baking sheet with parchment paper. Sift first 3 ingredients into medium bowl. Using electric mixer, beat butter and sugar in large bowl to blend well. Beat in eggs 1 at a time. Mix in lemon peel & vanilla. Beat in flour mixture just until blended. Stir in cranberries and pistachios (dough will be sticky). Turn dough out onto lightly floured surface. Gather dough together; divide in half. Roll each half into 15-inch-long log (about 1 1/4 inches wide). Carefully transfer logs to 1 prepared baking sheet, spacing 3 inches apart.
Bake logs until almost firm to touch but still pale, about 30-32 minutes. Cool logs on baking sheet 10 minutes. Maintain oven temperature.

Carefully transfer logs still on parchment to cutting board. Using serrated knife and gentle sawing motion, cut logs crosswise into generous 1/2-inch-thick slices. Place slices, 1 cut side down, on remaining 2 prepared sheets. Bake until firm and pale golden, about 9 minutes per side. Transfer cookies to racks and cool.

Sunday, December 16, 2007

It's Peanut Butter Jelly Time! Peanut Butter Jelly....


A few weeks ago I decided to participate in the "What's Cooking Nestie Recipe Exchange" hosted by Katie of Good Things Catered. Basically everyone submits a tried and true recipe and in return everyone receives back a recipe that they are supposed to make and blog about. I was happy to get the recipe I did! I had just "flagged" this one in my December 2007 issue of Cooking Light Magazine. Being a huge fan of anything peanut butter, this was the perfect recipe to try for one of those wintery cold Sunday nights when you just want to sit in front of your TV, veg out and eat homemade cookies.....then pack up ALL leftovers and send with my husband to his job Monday morning! My butt & thighs will thank me later!

Note: Please read the recipe fully before baking. I have noted alterations that I made


Peanut Butter & Jelly Thumbprints
Cooking Light Magazine
Yield: 36 cookies
(alterations in the original recipe will be starred)

Ingredients

2 cups all-purpose flour
1/4 teaspoon salt
3/4 cup packed brown sugar
2/3 cup granulated sugar
1/2 cup chunky peanut butter **** I'm a smooth PB gal!
1/4 cup butter, softened
2 large eggs
1 teaspoon vanilla extract
Cooking spray
7 tablespoons seedless raspberry preserves
1 tablespoon fresh lemon juice

Preparation

Lightly spoon flour into dry measuring cups; level with a knife. Combine flour and salt, stirring well with a whisk; set aside.

Place sugars, peanut butter, and butter in a large bowl; beat with a mixer at medium speed until well combined. Add eggs, 1 at a time, beating well after each addition. Beat in vanilla. Gradually add flour mixture to sugar mixture, beating on low speed just until combined.

Lightly coat hands with cooking spray. Shape dough into 36 balls (about 2 1/2 teaspoons each). Place balls 2 inches apart on baking sheets lined with parchment paper. Press thumb into center of each dough ball, leaving an indentation. Cover and chill 1 hour.

Preheat oven to 350°. (*** I have made many thumbprint cookies in my day, so instead of baking first then filling with the preserves as the recipe states below, I baked my cookies pre-filled with the preserves. I never tried the other method, I just know this one works very well for me. Do as you please!)

Uncover dough. Bake at 350° for 14 minutes or until lightly browned. Remove cookies from pans, and cool on a wire rack.

Place preserves in a small microwave-safe bowl, and microwave at HIGH 20 seconds, stirring once. Add juice, stirring until smooth. Spoon about 1/2 teaspoon preserves mixture into the center of each cookie.

Wednesday, November 21, 2007

Pecan pie....or not!


Two of my favorite things in life are:

1. Cookies!!!!

2. Pecan Pie

oh and 3...my husband of course! Sorry Enz!


My love of the common cookie is beyond measure. I mean what is there not to like about cookies? Your options are endless...crispy or chewy, chocolate or vanilla, topped or filled, dipped or sandwiched, bite-sized or super sized, topped with jam, filled with peanut butter, rolled in sprinkles, dredged in powdered sugar...I can go on and on! I freaking LOVE cookies and you will probably notice that most of my blogging will consist of cookies! Anyway back to my point! When I came across a recipe combining my two "loves" I knew it would be the perfect addition to our dessert table for this Thanksgiving. This recipe does not disappoint! Buttery, chewy & gooey, it's as close as you can get to a pecan pie while still keeping it simple and less traditional.


Cookie Ingredients:

1 cup firmly packed brown sugar
1/2 cup butter, softened
1 egg
1 teaspoon vanilla
2 cups all-purpose flour
1 teaspoon baking powder


Filling Ingredients:

1 cup chopped pecans
1/2 p firmly packed brown sugar
1/4 cup heavy whipping cream
1 teaspoon vanilla


Heat oven to 350°F. Combine all cookie ingredients except flour and baking powder in large bowl. Beat at medium speed until creamy. Reduce speed to low; add flour and baking powder. Beat until well mixed. Shape dough into 1 1/2-inch balls. Place 2 inches apart onto ungreased cookie sheets. Make indentation in each cookie with thumb; rotate thumb to hollow out slightly.Combine all filling ingredients in small bowl; fill each cookie with 1 rounded teaspoon filling. Bake for 9 to 12 minutes or until lightly browned. Cool 1 minute; remove from cookie sheets.


Monday, November 19, 2007

I Think I'm Over The Rainbow....Cookies!


OK so I've had enough! I mean don't get me wrong they ARE phenomenal! But 2 batches in 2 days time is a bit much. Plus it took me over an hour last night to scrub off the red food coloring that EXPLODED all over me...not fun! Don't worry...not all went in my belly! My first batch (see below) was my last trial run just to make sure I perfected the recipe. That batch was then brought over to my aunt's house for the Feast of St. Martino. Batch number 2 is for my husband's lovely co-worker, Tian. She fell in love with them last year when I sent a tray of my homemade cookies to his place of employment and asked if I could bake her a few. Though I didn't get the chance to then, short notice (3 days before the holiday), I had the perfect opportunity to bake them for her for Thanksgiving. Tian, I hope you enjoy!


Sunday, November 18, 2007

Holy Rainbow Cookies Batman!...errrr ummm I mean Shrek!


Growing up these cookies were a treat for my family. Because of time needed to make these, they were usually only served around the holidays. And by the time us "little" ones made it to the dessert table, they were gone...eaten...or snagged up by a few of my aunts that loved to hoard up (Is hoard even a word?) and package some food to take home for leftovers before everyone else got a chance to finish eating....which aunts they were...well i'm sure some of my cousins reading this know who they are! I decided enough was enough! I found a few recipes for these delectable little treats and after a few trials, I came up with the perfect recipe. And don't say I didn't warn you! The first time making these I guarantee your going to want to ripe your scalp off, but don't despair ladies and gentlemen! It gets easier after your first run and in no time you'll be popping these cookies out like something stuck between Mama's teeth. Ewwww sorry! I grossed myself out with that one. Enjoy!


Rainbow Cookies

Ingredients

4 large eggs

1 cup sugar

1 (8-oz) can almond paste

2 sticks unsalted butter, softened

2 cups all-purpose flour

1/2 teaspoon salt

35 drops red food coloring
35 drops green food coloring

1 (12-oz) jar apricot preserves, heated and strained

7 oz fine-quality bittersweet chocolate chopped


Preparation


Put oven rack in middle position and preheat oven to 350°F. Butter a 13- by 9-inch baking pan and line bottom with wax paper, leaving a 2-inch overhang on 2 ends, then butter paper. Beat eggs in mixer fitted with whisk attachment at medium-high speed. Add 1/4 cup sugar a little at a time. Transfer to another bowl.

Switch to paddle attachment, then beat together almond paste and remaining 3/4 cup sugar until well blended, about 3 minutes. Add butter and beat until pale and fluffy, about 3 minutes. Add almond extract and beat until combined. Reduce speed to low, then add flour and salt and mix until just combined. Mix in egg mixture.

Divide batter among 3 bowls. Stir red food coloring into one and green food coloring into another, leaving the third batch plain. Set white batter aside. Chill green batter, covered. Pour red batter into prepared pan and spread evenly with offset spatula (layer will be about 1/4 inch thick).
Bake red layer 10 to 11 minutes, until just set.

Using paper overhang, transfer layer to a rack to cool, about 15 minutes. Clean pan, then line with wax paper and butter paper in same manner as above. Bake white layer in prepared pan until just set. As white layer bakes, bring green batter to room temperature. Transfer white layer to a rack. Prepare pan as above, then bake green layer in same manner as before. Transfer to a rack to cool.

When all layers are cool, invert green onto a wax-paper-lined large baking sheet. Discard paper from layer and spread with half of preserves. Invert white on top of green layer, discarding paper. Spread with remaining preserves. Invert red layer on top of white layer and discard wax paper. Cover with plastic wrap and weight with a large baking pan. Chill at least 8 hours.

Remove weight and plastic wrap. Bring layers to room temperature. Melt chocolate in a double boiler or a metal bowl set over a saucepan of barely simmering water, stirring until smooth. Remove from heat. Keep chocolate over water. Trim edges of assembled layers with a long serrated knife. Quickly spread half of chocolate in a thin layer on top of cake. Chill, uncovered, until chocolate is firm, about 15 minutes. Cover with another sheet of wax paper and place another baking sheet on top, then invert cake onto sheet and remove paper. Quickly spread with remaining chocolate. Chill until firm, about 30 minutes.

Cut lengthwise into 4 strips. Cut strips crosswise into 3/4-inch-wide cookies.

Cooks' note:Cookies keep, layered between sheets of wax paper or parchment, in an airtight container at room temperature 2 weeks.