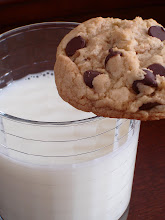
To say that I'd lose my head if it wasn't attached would be the biggest understatement! Not only was I tagged today by Rachel @ Good Thymes & Good Food but when reading her comment, I realized I was also tagged by Nikki @ Pennies on a Platter too....a few days ago! I'm sorry Nikki! Please forgive me! So because of my screw up, i'm going to post 10 facts about myself instead!
Rules:
1. Link to your tagger and post these rules.
2. Share 5 facts about yourself.
3. Tag 5 people at the end of your post and list their names (linking to them).
4. Let them know they've been tagged by leaving a comment at their blogs.
5 Facts about Me...actually 10.
1. I think i'm the only person in the world that does not watch "Lost."
2. I cringe at the thought of jarred tomato sauce.
3. I do all the cooking and my husband washes all the dishes. It's the one chore I dread the most.
4. I have a mild case of OCD. Before I go to bed: door locks, window locks and stove knobs have to be checked and all drawers must be closed fully as well as all closet doors (not even opened a crack). Oh and I make my hubby do it all! He He.
5. I can't brew a good cup of coffee.
6. 5 months after I got married I got 2nd degree burns on my right hand in a cooking accident! I learned my lesson!
7. I rock at Guitar Hero.
8. I'll never pass on a cookie especially Oreos.
9. I turn into a lunatic when I drive.
10. I excerise with a 5 pound hula hoop. I can hula for 25 minutes straight!
I would like to tag:
1. Nina @ Nina's Kitchen
2. Dori @ The Foodie Fashionista
3. Emiline @ Sugar Plum
4. Jenny @ Jenn's Jumpin Kitchen (fellow Jersey Gal!)
5. Emily @ Rediscovering The Joy Of Cooking
Saturday, February 16, 2008

Wednesday, February 6, 2008
Peanut Butter Cup Cookies

My husband and I got married in September of 2006 and up until then, the only baking I did was from a boxed cake mix or a premade roll of cookie dough. It's amazing what getting married does to some people. I managed to turn into one hell of a domestic diva...or as my husband calls me, Betty Crocker. Having a huge wedding in September doesn't leave much in your budget for Christmas shopping in December! I decided to pass up on all the crazy holiday shopping one goes through in the hopes of finding the perfect gift for fellow friends and family. I kept my christmas shopping to a minimum and decided that instead, I would pack up an assortment of homemade cookies as gifts. This also gave me the opportunity to start working on MY holiday baking list.....and what will be my list 30+ years from now when i'm baking for my grandkids! It's important to have the perfect recipes right? Anyway, I came across this one on allrecipes.com by accident (don't ask me how.) I know it's not your typical christmas cookie, but I only decided to give it a try because I actually had ALL the ingredients at home in my pantry and I was extremly bored and felt like I needed to bake. I was so happy I did. Not only are they fabulous, but they're so easy to make and did I mention fabulous? They also hold up very well....perfect for those holiday trays!


Peanut Butter Cup Cookies
recipe from allrecipes.com
INGREDIENTS
1 3/4 cups all-purpose flour
1/2 teaspoon salt
1 teaspoon baking soda
1/2 cup butter, softened
1/2 cup white sugar
1/2 cup peanut butter
1/2 cup packed brown sugar
1 egg, beaten
1 teaspoon vanilla extract
2 tablespoons milk
40 miniature chocolate covered peanut butter cups, unwrapped
DIRECTIONS
1/2 teaspoon salt
1 teaspoon baking soda
1/2 cup butter, softened
1/2 cup white sugar
1/2 cup peanut butter
1/2 cup packed brown sugar
1 egg, beaten
1 teaspoon vanilla extract
2 tablespoons milk
40 miniature chocolate covered peanut butter cups, unwrapped
DIRECTIONS
Preheat oven to 375 degrees F (190 degrees C).
Sift together the flour, salt and baking soda; set aside.
Cream together the butter, sugar, peanut butter and brown sugar until fluffy. Beat in the egg, vanilla and milk. Add the flour mixture; mix well.
Shape into 40 balls and place each into an ungreased mini muffin pan.
Bake at 375 degrees for about 8 minutes. Remove from oven and immediately press a mini peanut butter cup into each ball. Cool and carefully remove from pan (see note below!)
Sift together the flour, salt and baking soda; set aside.
Cream together the butter, sugar, peanut butter and brown sugar until fluffy. Beat in the egg, vanilla and milk. Add the flour mixture; mix well.
Shape into 40 balls and place each into an ungreased mini muffin pan.
Bake at 375 degrees for about 8 minutes. Remove from oven and immediately press a mini peanut butter cup into each ball. Cool and carefully remove from pan (see note below!)
Note...make sure you allow them to cool for about 10-15 minutes before you try to remove them from the pan or else see below!
Saturday, January 26, 2008
Foodie Blogroll!
I'm happy to announce that I am now part of the Foodie Blogroll! For anyone not familiar with what it is, it's a wonderful "community" of food blogs put together by Jenn of The Left Over Queen. If you love food as much as I do, you MUST take a look at some of the blogs listed (and try your hardest not to lick your computer screen!)...some of them are out of this world! For those interested, the blogroll is listed on the right hand side of this page. Enjoy!
Sunday, December 30, 2007
Cranberry Pistachio Biscotti
 I can't help but think of my father whenever I see or eat pistachios. My father can easily polish off an entire bag of them. He'll sit in front of the TV late at night when everyone else is in bed with a dish towel in front of him and he would begin cracking away at each individual shell one by one. And every morning I was sure to find a nice little happy trail of shells leading to the garbage can as well as a few left over on the rug where he sat. What a mess!
I have since gotten married and moved out. And as much as I complained then, having to clean up that mess, I sure do miss being at home with him. His love of the pistachio has rubbed off on me and now my husband. So when I looked in my pantry one day and saw this HUGE bag sitting in front of me, I knew I had to do something about it! I grew tired of eating just a plain pistachio and wanted something "close to home." Being from an Italian family, we always had biscotti around the house so when I saw this recipe on epicurious.com I knew it was the perfect solution. I tweeked the original recipe a bit. And i'm very happy with the results. I cut down both amounts of pistachios and cranberries, omitted the aniseed and added a bit more lemon peel. I was able to satisfy my craving and send the rest home to dad! Enjoy!

Cranberry Pistachio Biscotti
Ingredients:
2-1/4 cups all purpose flour
1-1/2 teaspoons baking powder
3/4 teaspoon salt
6 tablespoons unsalted butter, room temperature
3/4 cup sugar
2 large eggs
1-1/2 tablespoon grated lemon peel
1-1/2 teaspoons vanilla extract
3/4 cup dried sweetened cranberries
1/2 cup shelled natural unsalted pistachios
Directions:
Preheat oven to 325°F. Line 1 large baking sheet with parchment paper. Sift first 3 ingredients into medium bowl. Using electric mixer, beat butter and sugar in large bowl to blend well. Beat in eggs 1 at a time. Mix in lemon peel & vanilla. Beat in flour mixture just until blended. Stir in cranberries and pistachios (dough will be sticky). Turn dough out onto lightly floured surface. Gather dough together; divide in half. Roll each half into 15-inch-long log (about 1 1/4 inches wide). Carefully transfer logs to 1 prepared baking sheet, spacing 3 inches apart.
Bake logs until almost firm to touch but still pale, about 30-32 minutes. Cool logs on baking sheet 10 minutes. Maintain oven temperature.
Bake logs until almost firm to touch but still pale, about 30-32 minutes. Cool logs on baking sheet 10 minutes. Maintain oven temperature.
Carefully transfer logs still on parchment to cutting board. Using serrated knife and gentle sawing motion, cut logs crosswise into generous 1/2-inch-thick slices. Place slices, 1 cut side down, on remaining 2 prepared sheets. Bake until firm and pale golden, about 9 minutes per side. Transfer cookies to racks and cool.

Sunday, December 16, 2007
It's Peanut Butter Jelly Time! Peanut Butter Jelly....

A few weeks ago I decided to participate in the "What's Cooking Nestie Recipe Exchange" hosted by Katie of Good Things Catered. Basically everyone submits a tried and true recipe and in return everyone receives back a recipe that they are supposed to make and blog about. I was happy to get the recipe I did! I had just "flagged" this one in my December 2007 issue of Cooking Light Magazine. Being a huge fan of anything peanut butter, this was the perfect recipe to try for one of those wintery cold Sunday nights when you just want to sit in front of your TV, veg out and eat homemade cookies.....then pack up ALL leftovers and send with my husband to his job Monday morning! My butt & thighs will thank me later!
Note: Please read the recipe fully before baking. I have noted alterations that I made

Peanut Butter & Jelly Thumbprints
Cooking Light Magazine
Yield: 36 cookies
(alterations in the original recipe will be starred)
Ingredients
2 cups all-purpose flour
1/4 teaspoon salt
3/4 cup packed brown sugar
2/3 cup granulated sugar
1/2 cup chunky peanut butter **** I'm a smooth PB gal!
1/4 cup butter, softened
2 large eggs
1 teaspoon vanilla extract
Cooking spray
7 tablespoons seedless raspberry preserves
1 tablespoon fresh lemon juice
Preparation
Lightly spoon flour into dry measuring cups; level with a knife. Combine flour and salt, stirring well with a whisk; set aside.
Place sugars, peanut butter, and butter in a large bowl; beat with a mixer at medium speed until well combined. Add eggs, 1 at a time, beating well after each addition. Beat in vanilla. Gradually add flour mixture to sugar mixture, beating on low speed just until combined.
Lightly coat hands with cooking spray. Shape dough into 36 balls (about 2 1/2 teaspoons each). Place balls 2 inches apart on baking sheets lined with parchment paper. Press thumb into center of each dough ball, leaving an indentation. Cover and chill 1 hour.
Preheat oven to 350°. (*** I have made many thumbprint cookies in my day, so instead of baking first then filling with the preserves as the recipe states below, I baked my cookies pre-filled with the preserves. I never tried the other method, I just know this one works very well for me. Do as you please!)
Uncover dough. Bake at 350° for 14 minutes or until lightly browned. Remove cookies from pans, and cool on a wire rack.
Place preserves in a small microwave-safe bowl, and microwave at HIGH 20 seconds, stirring once. Add juice, stirring until smooth. Spoon about 1/2 teaspoon preserves mixture into the center of each cookie.

Saturday, December 8, 2007
Tequila Christmas Cake
Ingredients:
1 cup of water
1 tsp baking soda
1 cup of sugar
1 tsp salt
1 cup of brown sugar
Lemon juice
4 large eggs
Nuts
1 bottle tequila
2 cups of dried fruit
Sample the tequila to check quality. Take a large bowl, check the tequila again. To be sure it is of the highest quality, pour one level cup and drink. Repeat. Turn on the electric mixer. Beat one cup of butter in a large fluffy bowl. Add one teaspoon of sugar. Beat again. At this point it's best to make sure the tequila is still OK. Try another cup...just in case. Turnoff the mixerer thingy. Break 2 leggs and add to the bowl and chuck in the cup of dried fruit. Pick the frigging fruit up off floor. Mix on the turner. If the fried druit gets stuck in the beaterers just pry it loose with a drewscriver. Sample the tequila to check for tonsisticity. Next, sift two cups of salt. Or something. Check the tequila. Now shift the lemon juice and strain your nuts. Add one table. Add a spoon of sugar, or some fink. Whatever you can find. Greash the oven. Turn the cake tin 360 degrees and try not to fallover. Don't forget to beat off the turner. Finally, throw the bowl through the window. Finish the tequila and wipe counter with the cat.
CHERRY MISTMAS!
1 cup of water
1 tsp baking soda
1 cup of sugar
1 tsp salt
1 cup of brown sugar
Lemon juice
4 large eggs
Nuts
1 bottle tequila
2 cups of dried fruit
Sample the tequila to check quality. Take a large bowl, check the tequila again. To be sure it is of the highest quality, pour one level cup and drink. Repeat. Turn on the electric mixer. Beat one cup of butter in a large fluffy bowl. Add one teaspoon of sugar. Beat again. At this point it's best to make sure the tequila is still OK. Try another cup...just in case. Turnoff the mixerer thingy. Break 2 leggs and add to the bowl and chuck in the cup of dried fruit. Pick the frigging fruit up off floor. Mix on the turner. If the fried druit gets stuck in the beaterers just pry it loose with a drewscriver. Sample the tequila to check for tonsisticity. Next, sift two cups of salt. Or something. Check the tequila. Now shift the lemon juice and strain your nuts. Add one table. Add a spoon of sugar, or some fink. Whatever you can find. Greash the oven. Turn the cake tin 360 degrees and try not to fallover. Don't forget to beat off the turner. Finally, throw the bowl through the window. Finish the tequila and wipe counter with the cat.
CHERRY MISTMAS!
Wednesday, December 5, 2007
Virtual Housewarming!

I'm very new to this whole food blogging thing and I've come across quite a few in the past few months. But I'll never forget the first one I ever came across. That would be Peabody's! I was in awe of not only her vast collection of recipes, but of her writing style and most of all, her photos. Her pictures will make anyone want to lunge into their computer screen and grab hold of her latest creation.
Due to some family and work related issues I was facing recently, I haven't had the time to catch up on some bookmarked blog posts. So it wasn't until early this evening I saw that Peabody was hosting a potluck style "virtual" housewarming party for her new home. I knew I wanted to "bring" something! With an almost empty refrigerator and a few minutes before I had to run out for some overdue Christmas shopping, I was able to put together a little appetizer. I'm bringing some bruschetta....so not something I would typically bring to a housewarming party (I'm more of a baker than a cook!). I apoligize in advanced because I can do so much better than this, but I didn't want to miss this one!
Peabody, congrats on your new home! Enjoy!!!
Red Velvet Cupcakes

When it was time to bake something for our Thanksgiving dessert table, I knew I wanted to stay away from your traditional pumpkin/apple/pecan pie (even though I also made some pecan pie cookies, see below). I knew red velvet was the way to go. I have always been a fan, but wasn't sure my family had ever even heard of it. I was quite surprised, however, when people were asking..."Who made the red velvet cupcakes?" Again, it's not something my family normally had around any of our holidays and get togethers, but it was received well.
I've tried other recipes in the past, but when a fellow co-worker brought in a few of her cupcakes to sample, I knew it was THE recipe to use. With striking bright red coloring sharply contrasted by a velvety white cream cheese frosting, and a very subtle...and I mean subtle!... chocolate flavor, it's fun to eat as well as to look at. There is only one word to describe this confection and that is ....FABULOUS! I hope you enjoy!


Red Velvet Cupcakes with Cream Cheese Frosting
Paula Deen (original recipe here)
For the cupcakes:
2 1/2 cups all-purpose flour
1 1/2 cups sugar
1 teaspoon baking soda
1 teaspoon salt
1 teaspoon cocoa powder
1 1/2 cups vegetable oil
1 cup buttermilk, room temperature
2 large eggs, room temperature
2 tablespoons red food coloring
1 teaspoon white distilled vinegar
1 teaspoon vanilla extract
For the Cream Cheese Frosting:
1 pound cream cheese, softened
2 sticks butter, softened
1 teaspoon vanilla extract
4 cups sifted confectioners' sugar
For the cupcakes:
Preheat the oven to 350 degrees F. Line 2 (12-cup) muffin pans with cupcake papers.
In a medium mixing bowl, sift together the flour, sugar, baking soda, salt, and cocoa powder. In a large bowl gently beat together the oil, buttermilk, eggs, food coloring, vinegar, and vanilla with a handheld electric mixer. Add the sifted dry ingredients to the wet and mix until smooth and thoroughly combined.
Divide the batter evenly among the cupcake tins about 2/3 filled. Bake in oven for about 20 to 22 minutes, turning the pans once, half way through. Test the cupcakes with a toothpick for doneness. Remove from oven and cool completely before frosting.
For the Cream Cheese Frosting:
In a large mixing bowl, beat the cream cheese, butter and vanilla together until smooth. Add the sugar and on low speed, beat until incorporated. Increase the speed to high and mix until very light and fluffy.

Subscribe to:
Posts (Atom)